The Grand Road Trip, Part I: Kentucky to South Dakota

The Grand Road Trip, Part I: Kentucky to South Dakota

The Gnome and I have never been big travelers. It’s not that we don’t enjoy seeing more of the world—it’s just that we’re always so busy with can’t-wait projects around here. (Not to mention the many years when money for travel was an extravagance we couldn’t consider.)

The past year has been a rare exception. Not only have we traveled more, but circumstances conspired in such a way that we took two major trips in just six months’ time. As I wrote here and here, we recently returned from visiting long-time friends in California. It was quite the trip. But last fall, we headed out on an even bigger journey, a 24-day road trip of more than 6,000 miles (and 4,000 photos—really!)—another long-promised trip both to ourselves and to close-in-heart but far flung cousins and other family.

That trip, too, took us through previously unexplored territory. On our travels, we wound through fifteen states, seven of them new to us. We got to spend time (oh, so little) in Glacier, Grand Teton, Yellowstone, and Badlands National Parks and too many national forests to count.

Of course, the best parts of the trip were the good times we spent with our relatives—not to mention the gourmet meals they prepared for us! They treated us like royalty. But that was family time, private time, so it won’t get any further mention here. But the incredible scenery and the history we encountered along the way was pretty phenomenal too. That I do want to share with the world. And there was so much of it, I realize this story has to be serialized.

First things first. Our driving on Day One ended in Louisville, Kentucky. Louisville will always hold a special place in our hearts. It’s where we moved following our wedding and honeymoon, and we stayed for twelve years. Both of our children were born there. Except for the humid summer heat, we loved everything about Louisville and nothing—except wanting a mountain home nearer our families could have driven us away.

It’s been years since we’d been back, and while much is the same, lots of changes have come to River City since we left, too. Sometimes it was hard to get our bearings, but we had to check out a few of our favorite old haunts. Our first home-of-our-own is still there (minus a couple of special dogwoods), but barely. A church parking lot expansion has taken all but a few houses on that block.
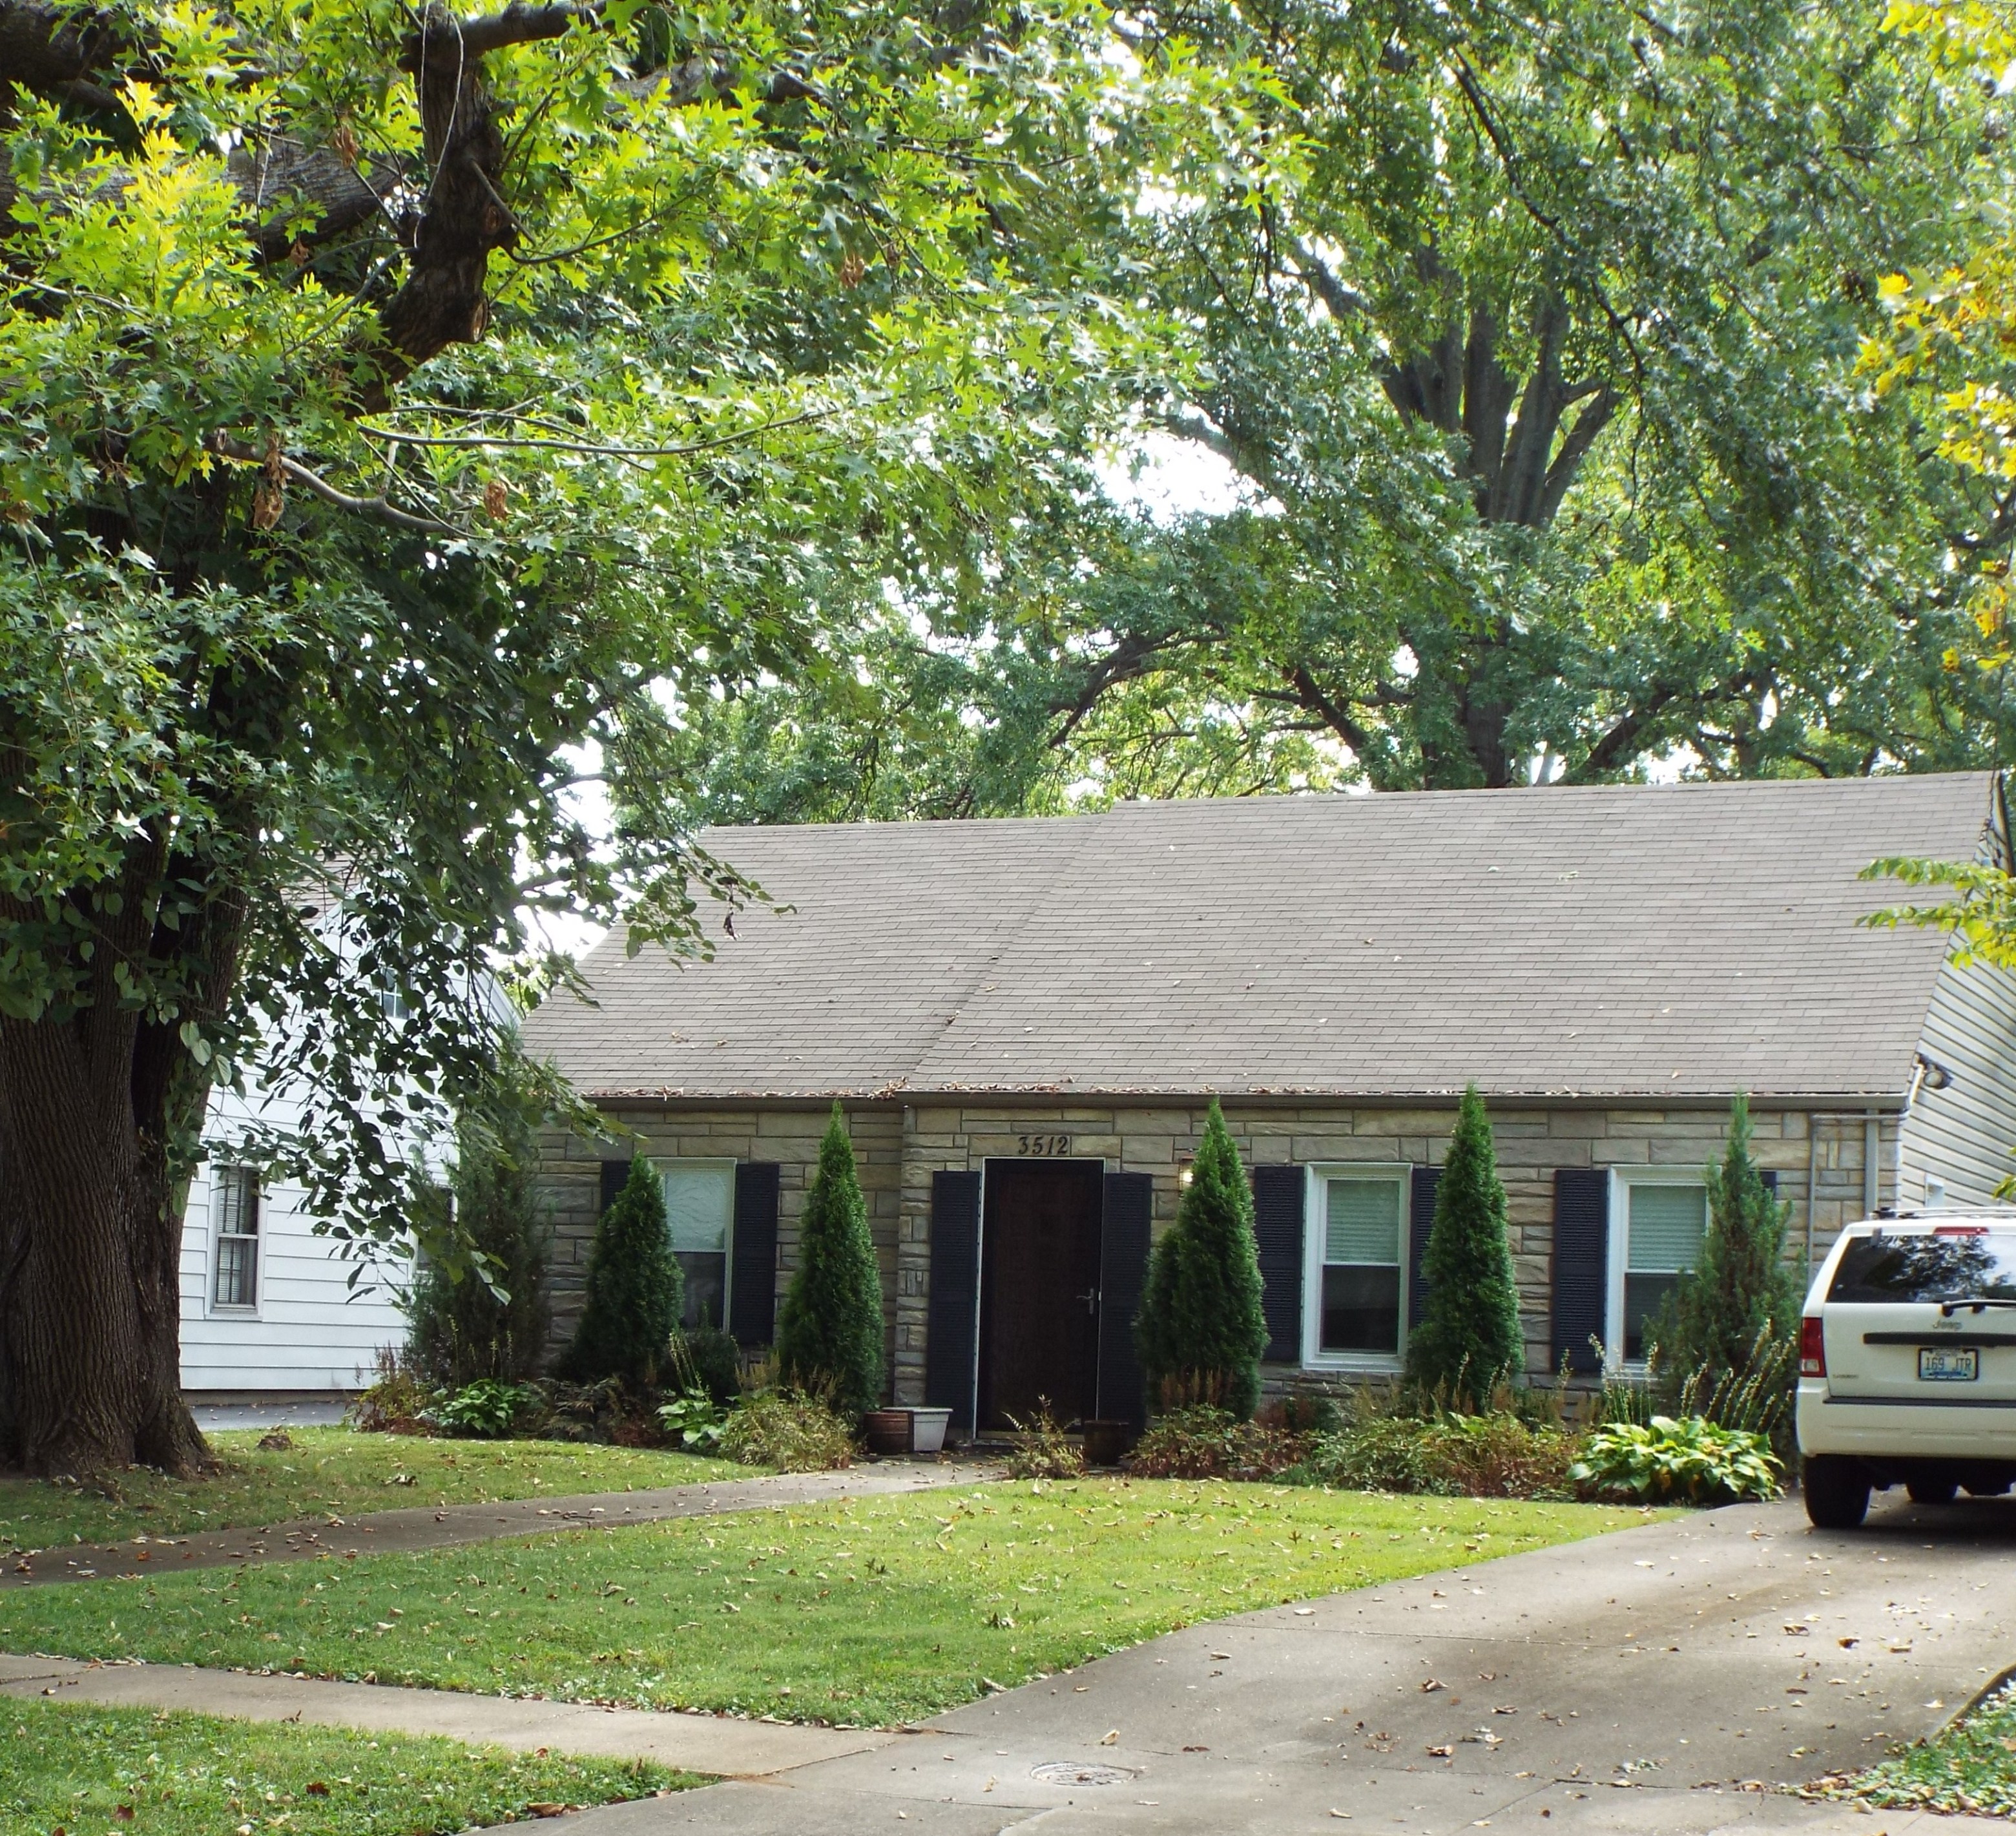
We sat on the banks of the Ohio munching on Kingfish Restaurant’s onion rings while the Belle of Louisville graced us with her presence.And then there’s Plehn’s Bakery—A Louisville staple for almost a hundred years and one of our favorite weekend destinations back in the day. We couldn’t say goodbye to Louisville without dropping in for our favorite butter kuchen. I wish they shipped!

We didn’t have time to take in any of Louisville’s many tourist and cultural venues, but it’s chock full of them, from Churchill Downs to the Muhammed Ali Center to Actor’s Theatre. I highly recommend Louisville as a vacation destination. You’d never get bored.

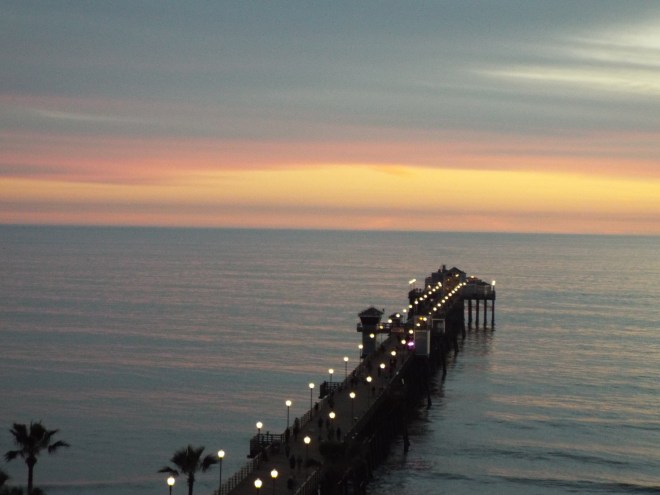
Louisville already had a phenomenal park system (eighteen parks and six parkways designed by the father of American landscape design, Frederick Law Olmstead). Now, the city has added 85 acres of waterfront green space and walking paths. A great place for family frolicking. The mighty Ohio itself has become a haven for paddlers. We were delighted to discover that the old Big Four railroad bridge has been transformed into a walking bridge that will take you across the state line into Indiana. It’s clearly a popular walking and cycling spot. Lit up at night, it’s all about romance. We had a terrific view of the bridge from our riverside restaurant terrace. I could have stayed for hours.

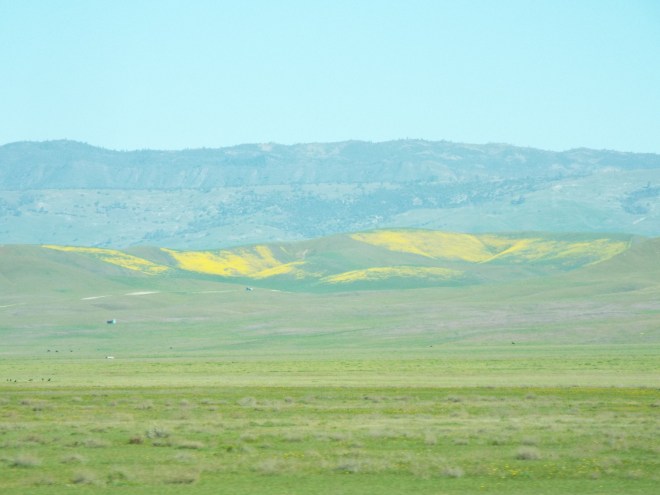
Time has been good to Louisville.
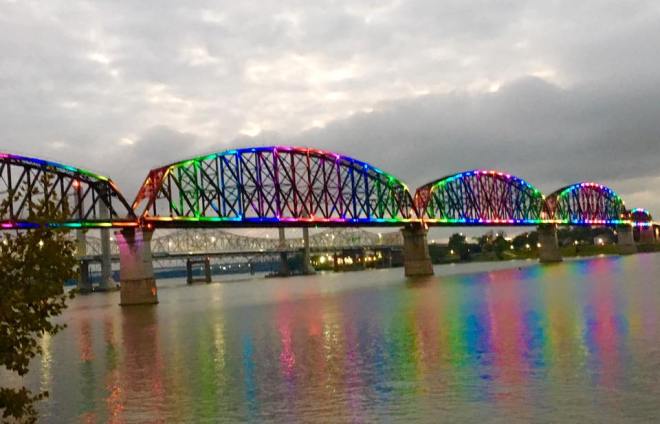
From Louisville we traveled across Indiana and up to northwestern Illinois. We know this route, but the dramatic change from flat plains to rolling hills always catches us off guard. When we visited the museum in charming Galena, we learned a little more about the landscape and its history. The Driftless, an area encompassing parts of Wisconsin, Minnesota, Iowa, and Illinois, escaped the flattening effect of glacial ice fields way back when. As a result, the region is graced with millions of bluffs and valleys with elevation changes of up to 1100 feet. Right in America’s heartland. Driving through the pastoral Driftless is not only beautiful, it’s calming. Good for what ails you.
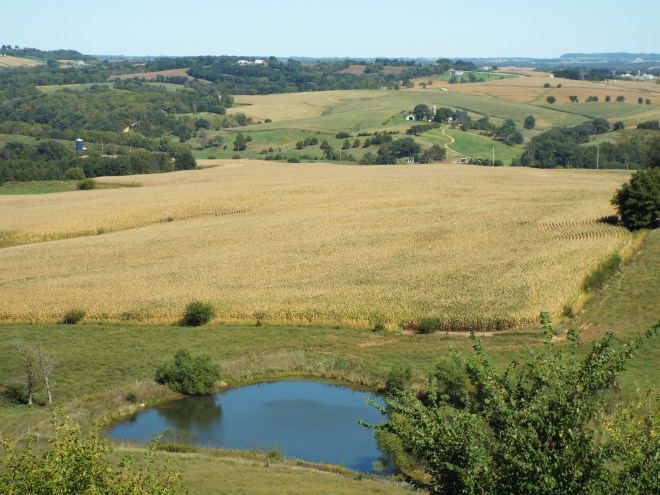
Something we hadn’t seen before in our travels through this area was the silver glint of massive wind farms. Wind turbines filled nearby fields and faded into the distance. Far too many to count. Farther than the eye could see. Watching the blades turn while listening to a classical piece on the car radio nearly put me into a hypnotic trance.DSCF1271Of course, we drove past miles and miles of corn. It was higher than the proverbial elephant’s eye. I wondered if any of it was being grown for human consumption.

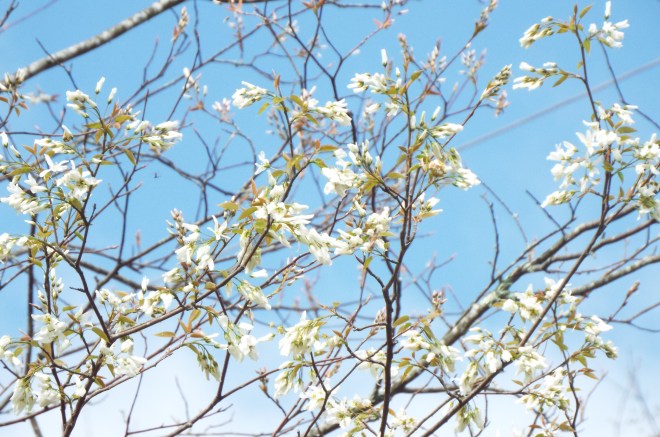
Not a cloud in the sky

After a couple of days in southeastern Minnesota, we traveled across that state on our way to South Dakota and then Montana, passing even more massive wind farms and even more corn. I know people make jokes about how boring the flat landscape of the plains states is, but we found it to be soothing. Three (big) states’ worth of soothing. The thing is that with all that flatness—and fewer and fewer trees along the way—the sky seems to grow ever larger. So much space. So blue. So cloudless. Honestly, we hardly ever saw even the smallest trace of a cloud all the way across those three states.  And the landscape is ever-changing.  I was afraid to blink for fear of missing something. But I’m getting ahead of myself.

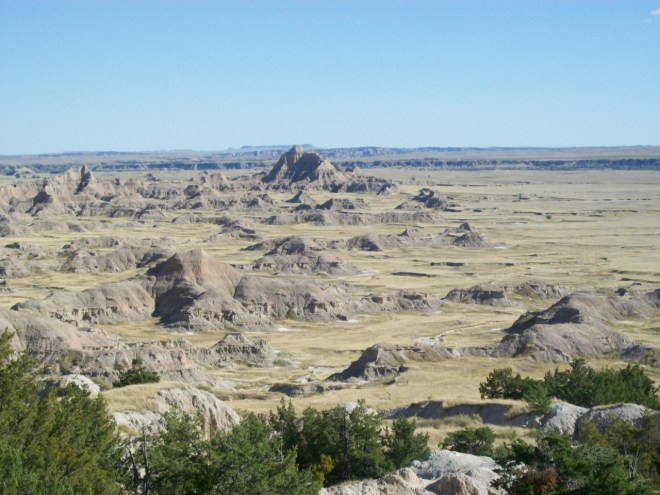
Back to South Dakota—-we had only given ourselves a few hours to spend in the Badlands, but every minute was magnificent, and it took no time for us to know for certain that we’ll be coming back here for an extended stay. We could barely stand upright against the strong wind gusts, and the glaringly bright sun made it impossible to catch the nuanced but striking shades of color in the rock.

Looking out across the canyons and the vast expanse of land with buttes rising from the plains, we were transported to the movie and TV westerns of our youth, imagining the black-hatted bad guys firing off shots from behind some unknown rock deep in a canyon. It was hard to believe we were looking at something real.
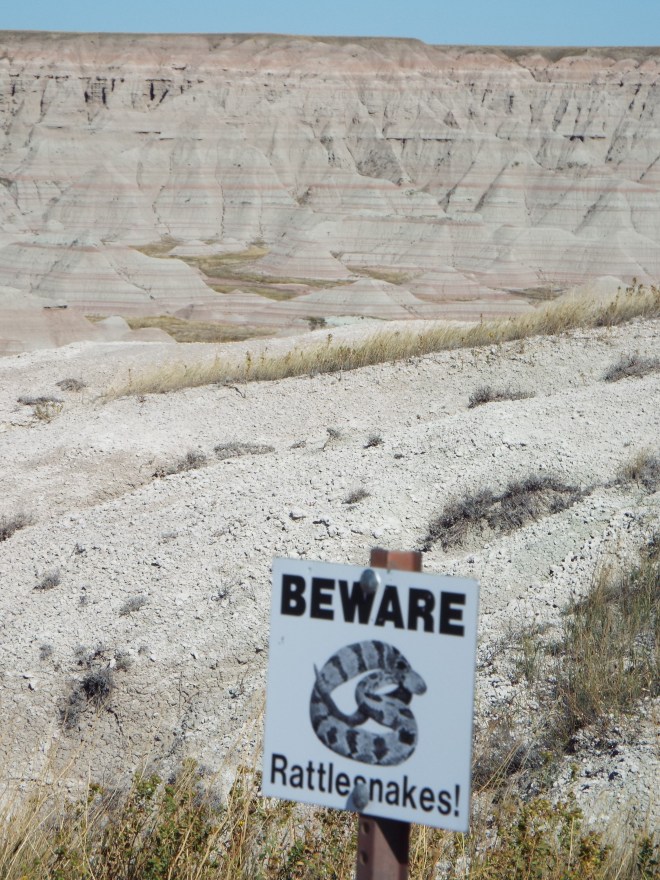
This sign kept us on our toes—especially me with my sandal-exposed tootsies.

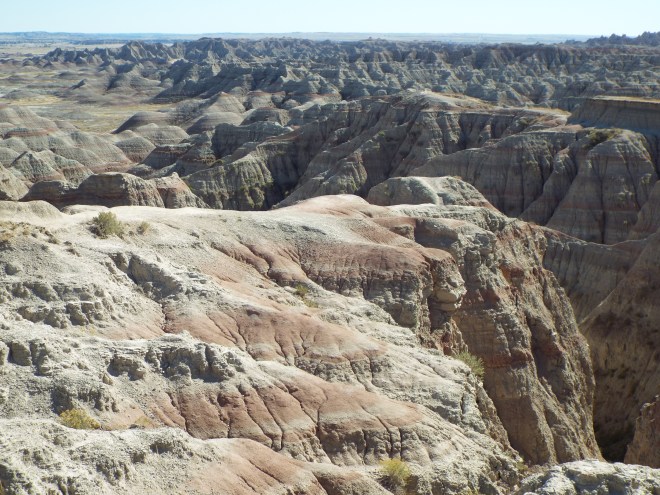
Again, no clouds. Not anywhere.

And our trip was just beginning.

(Stay tuned for Part II of The Grand Road Trip, full of unexpected discoveries. Coming soon.)

Secret Name

My writing tends to lean toward essays, especially personal or descriptive ones. Occasionally, though, something comes to me in poetic form, or at least something akin to it.  In honor of Poetry Month (yes, I know I’m a few weeks late, but I had other things to write about in April—besides, every month should be Poetry Month) I send you this offering.

Secret Name

They used to call me Earth Mother
in our ’70s consciousness raising group.
I sat like a cat curled up on the floor
in long flowing skirt and macrame belt,
almost always wearing earth tones,
comfortable in my own skin
still sagging from giving birth.

Today, I’m growing back into that old metaphor—
poking bare toes in warm garden soil,
hair wild around me like branches of a gnarled old tree;
or wandering the woods seeking nature’s treasures
to dress up my home.
I still curl up, but in a soft old chair—
I can’t get up from the floor these days.

Signs of Spring

Signs of Spring

In these parts, it’s a sure sign of spring when the white, pink-tinged flowers of the native serviceberry trees come into bloom. Those delicate blossoms burst open in our corner of the world a couple of weeks ago. Everywhere. All at once.

dscf8265.jpg

Almost as dainty as snowflakes

So even though almost everything else is bare and we were immediately plunged into yet another cold snap (so often our mountain springtime fate), it’s comforting that the serviceberry knows spring is here.

See how bare all the other trees are?

There are more than two dozen species of the serviceberry tree. Most all are native to the U. S., and they grow in practically every state. Depending on where you live, you may know them by another name. Maybe shadbush, juneberry, shadblow, or their Native American name, saskatoon. In the east, it’s just plain serviceberry, or sarvisberry in our southern mountain dialect.

There are lots of stories about how the serviceberry came by its name. The one I’m particularly fond of says that back in the day, the tree came into flower just as the roads in the Appalachian mountains became passable enough that a circuit-riding preacher could finally travel this way again to hold service—or sarvis. Time for marrying and burying to resume. That explanation may be a bit fanciful, but isn’t it a lovely notion?

There’s more to the serviceberry than its early blooms or the tales associated with it. A member of the rose family, the serviceberry is a good landscaping choice with its pretty spring flowers and its striking fall foliage. In the summer, the tree bears berries that turn from red to purplish-blue as summer wears on. Bird love them. So do humans who’ve had the good fortune to discover them (and the good luck to beat the birds to them). The ripe berries both look and taste a lot like blueberries and are eaten raw or used for jelly- and pie-making. They can be added to breads, dried like raisins, or turned into juice or syrup. Like blueberries, they’re also highly nutritious.

Most of the serviceberries around here are natives, twenty to sixty feet tall. With their upward-stretching limbs, it’s hard to get at those berries. But you can purchase shrub-sized ones, which makes berry collecting ever so much easier. We have a young serviceberry down our road (courtesy of the birds, no doubt), so we’ve been able to sample some berries. Delicious!

If you see a serviceberry in bloom, make a note of it. Then check back in July or so for some tasty—and free—eating. You won’t be sorry.

Recipes: Rhubarb Syrup and Rhubarb Soda

Recipes: Rhubarb Syrup and Rhubarb Soda

Maybe you’re already seeing ruby-red stalks of rhubarb in the produce section of your favorite grocery store. If so, you need to grab them up and rush home to make your favorite rhubarb dish—in my experience, stores stock the stalks for only a few short weeks in springtime.

For this reason, I used to think rhubarb’s season was short-lived, but if you grow it, you know the plant continues to grow all summer long. If you’re like me, you have more rhubarb than you know what to do with, yet you don’t want any food source to go to waste—especially one that’s so chock full of important vitamins and other nutrients.

Making rhubarb syrup for soda (and other uses) is one quick, easy, and delicious way to use up a fair supply of your abundant crop. Yes, it’s sugary,  but much better for you than that bottled high-fructose-corn-laden stuff that comes off the grocery shelf. It’s simple to make, too—just three ingredients.

I first discovered this recipe in John Ivanko and Lisa Kivirist’s excellent Farmstead Chef. More than a cookbook, it’s about real food, sustainability, community. But it’s a darned good cookbook, too, with plenty of vegetarian and vegan recipes (and a  few that aren’t) that take their cue from what’s in season, so if you grow your own or frequent your local farmers’ market, Farmstead Chef is going to be right up your alley.

Their recipes aren’t just tasty; they’re simple and sensible, too—you won’t have to go searching in specialty stores for ingredients you’d likely never use again for any of these recipes. Besides, Lisa and John are the coolest!  You never know what they’re going to be up to next. I highly recommend this book (as well as their books on sustainability).

I’ve tweaked the instructions a tad to suit my tastes and food prep style.

Rhubarb Syrup and Soda

Put twelve cups of fresh, chopped rhubarb and 2 cups of water in a large nonreactive pot. Bring to boil, then reduce heat to low. Cook until the rhubarb is soft and pulpy (approximately 20-30 minutes). Alternatively, you can cook on low in a slow cooker for a couple of hours.

Place a fine mesh sieve over a large bowl and drain the juice into it. Use the back of a large spoon to press out as much liquid as you can without forcing the pulp through the sieve. (You’re done with the pulp now, so you can add it to your compost,okay?)

Return the liquid to the pot and place over very low heat. Add 3 cups of sugar, stirring constantly until it’s dissolved.

At this point you have rhubarb syrup, which you could use in any number of applications, but since this is a recipe for soda, we’ll stick to that plan for now.

Let syrup cool to room temperature. Now you have three choices. Refrigerate it or freeze* it for later use or enjoy it right this minute. Here’s how.

Lightly mix 1 part syrup to 2 parts unflavored seltzer water.** So, for a 12-oz. glass, 1/4 cup syrup and 1/2 cup seltzer. At this point, you’ll need to do a little taste-testing and, if needed, either add more syrup or seltzer to suit your taste buds. Be sure to make a note of your final proportions for future reference. Pour mixture into an an ice-filled glass (a 12 oz. glass is the perfect size) for some lovely, blush-pink bubbly. If you’re serving a crowd, you can mix up a bigger batch and serve immediately from a pitcher—you don’t want to lose the fizz factor.

* You can freeze your syrup in wide-mouth Mason jars. They’re freezer proof as long as you leave an inch or two of head space. I prefer using these white plastic lids rather than the two-piece contraptions that come with the jars. These days you can find the lids in most stores that carry canning supplies.

Because of the sugar content, the mixture doesn’t freeze solid, so when you find yourself in a winter funk and need a pick-me-up, it’s easy to dish a few spoonfuls of this magical elixir into a glass and top it off with seltzer. Spring in a glass.

Cheers!

**I’ve also tried this with lemon-lime flavored seltzer, and really liked the extra flavor complexity.

(Check back next week for more on versatile rhubarb.  Click here for my easy skillet rhubarb upside-down cake.)

Early Days on the Diagonal Bonus Blog: A Look Back

Early Days on the Diagonal Bonus Blog: A Look Back

(If you’re just joining this series, it will all make more sense if you start with the first one and work your way forward.)

Our house is far from perfect, but there’s something better than perfection in knowing we did it ourselves. That’s what brings us joy every single day. And things certainly haven’t always gone as planned. But then, do they ever? As I’ve previously mentioned, before we ever “finished” our building project, it was time for some serious renovation and rehab work. We’re still in that mode. This time around, we’re thankful we can work at a slower pace, taking on projects when they fit the rest of our plans.

I’ve been thinking a bit lately about what advice I’d give my younger self—or anyone else thinking about doing something similar. What have I learned from our experience? What would I do differently if I had it to do over?  What did we get just right the first time?  I tried to narrow my thoughts to ten worthy points, but I just couldn’t do it. Guess I learned more than I realized. So, here, from my 38 year perch of experience, are twelve bits of wisdom for diy homebuilding newbies.

1. Do your homework. Learn about the area as well as local building codes. If possible, you might even want to rent a place nearby for awhile to give yourself time to search out the perfect location and to become familiar with your new community—to make sure it’s a good fit.

2. Seek out like-minded folks. It can get lonely out there. The idea of homesteading used to be all about going it alone. These days, folks have learned that community makes a lot more sense. Never underestimate the benefit of a support system or the value of experience.

3. Make friends with your neighbors. You’ll likely be living with them for a long, long time. The folks down the road may have an overabundance of apples, and you may have extra downed trees they could use for firewood. Maybe someone would mentor you in exchange for some of the honey your bees produce. Besides, these people are your “first responders.” They’ll be there in time of need. 

4. This is no time for the it’s-better-to-beg-forgiveness-than-to-ask-permission philosophy. If your community has a building code, the people who manage it take it seriously, and you’re not likely to get forgiveness after the fact. Be clear and open about your plans, and be 100% certain that you hear what’s actually said, not just what you want to hear. It’d be a real shame to have to walk away from something you’ve put your heart, soul, and financial investment into because of a misunderstanding over the rules, but it happens. Don’t let it happen to you.

5. Be flexible. If there’s one thing you can count on it’s that things won’t go as planned. When they don’t, smile and find a workaround. 

6. Have someone knowledgeable check your plans for common sense. Did you forget to include a closet? Would it make more sense, from a plumbing point of view, to relocate your bathroom? 

7. Be willing to compromise. And don’t beat yourself up over it. I once heard an experienced modern homesteader respond to a question about homesteading purity this way: “Everybody makes compromises. The few who don’t—or can’t—die alone and lonely.” As I recalled times we found it necessary to choose expediency over perfection, I realized he made a good point. 

8. Don’t underestimate how much it’s going to cost or how long it’s going to take. (Actually, just assume you’ll do both and be ready to adjust.)

9. If you can possibly manage it, stay out of debt. If it’s too late, get out as soon as you can. See how much that mortgage is really costing by the time you’ve paid it off with interest. Credit card debt is even worse. Do the math. You may decide it’s worth the sacrifice of going without while you whittle down your debt.

10. Look to the future. When you’re thirty, climbing stairs several times a day may not be a big deal, but you’re embarking on a once-in-a-lifetime experience; you may want to stay here forever. What happens when your knees give out? Or when an elderly parent needs to move in? Easier to put a bedroom and bath on the first floor now. (Ask me how I know.)

11. Just do it! Dive into your big adventure with all the gusto you’ve got. If you hesitate, you might miss something phenomenal.

12. Be patient—with yourself, with your family, with your grand project. And remember to laugh—a lot!

More than once I’ve looked at these old pictures in wonder, trying to conjure up the young whippersnappers who thought they could move to a strange place, camp in the wild, and—with no experience—build their  home themselves. Sometimes I even think I can see them, if ever so faintly. This series has been a fun trip down memory lane. Hope you’ve enjoyed it, too. I’m happy to say that after thirty-eight years of living on the diagonal, we’re still here and not planning to go anywhere anytime soon.

Here are some last looks.

pict0039

Against the sky

pict0019

We were always struck by what we saw as a Japanese style of artistry and simplicity in the bones of our house.

img012

A well-deserved nap

img011

Catnap times two

img028_edited-1

Hamming it up for the camera

pict0027

Section of first floor ceiling

And then there’s this heart-stoppingly gorgeous view of the nearby valley shrouded in clouds. It would be worth living here if only for sights like this.

pict0068

Cloud-hidden, Whereabouts Unknown

Skillet Rhubarb Upside-Down Cake

Nothing says Spring like the bright freshness of rhubarb, the earliest vegetable to come to life in our garden each year. Everything about rhubarb is delightful. It’s not fussy. It’s tough—it can take spring’s unpredictable temperature swings. It’s reliable, coming back bigger and stronger every year. It’s a showoff with its gargantuan leaves and showy, red stalks.

Rhubarb’s massive leaves could serve as emergency umbrellas. But don’t eat them, please—they’re full of poisonous oxalic acid.

Perhaps its only flaw is that rhubarb needs winter’s cold to thrive. As a child of the hot South, I’d never even heard of rhubarb before that fateful summer when our family camped our way to visit my Minnesota cousins. I’ll always remember the moment Aunt Ruth handed me a saucer of deliciousness in the form of a triangle slice of rhubarb pie. I fell in love right then and there. Unfortunately, it was years before I made my way to a climate where rhubarb would thrive and I could bake my own rhubarb pies.

It’s images of pie that dance in most of our heads when we hear the word rhubarb, but this odd vegetable has lots of other culinary uses, too. Jam, for one (mm-m good). There are rhubarb breads, rhubarb wines, and non-alcoholic rhubarb drinks. We’ve even made rhubarb pickles. They’re more pulp than anything else, but I think they make a nice condiment, and they give a flavorful kick to stir-fry. I was surprised recently to learn that rhubarb is also used in savory dishes. You can find over 300 rhubarb recipes in the online Rhubarb Compendium. But you won’t find this recipe for Skillet Upside-Down Cake there.

I swear, this cake gives rhubarb pie a run for its money. While it doesn’t pack quite the puckery, acidic wallop as its counterpart with crusts, it still has enough tang to be interesting, which makes it a good way to introduce rhubarb to young, inexperienced palates.

Skillet Rhubarb Upside-Down Cake

Oven: 350 degrees

Don’t you just hate it when you start mixing up a recipe only to discover these dreaded words: butter, at room temperature. Well, consider yourself forewarned. Don’t start mixing until you’ve given your butter a chance to warm up.

Topping:

¼ cup (½ stick) butter
¾ cup firmly packed dark brown sugar
2 cups (about six stalks) rhubarb cut into ½ inch pieces

Batter:

½ cup (1 stick) butter, at room temperature (See? I told you.)
1 cup white sugar
2 eggs
2 tsp vanilla
¼ tsp salt
1 Tbsp baking powder
1 ¾ cups all-purpose flour
½ cup milk

To make the topping, melt the ¼ cup of butter in a cast iron skillet.* Add brown sugar, stirring constantly until it melts and the mixture gets all bubbly. Remove from heat and layer pieces of rhubarb on top of butter-sugar mixture. You should have enough rhubarb to cover the pan in a more or less single layer.

In a mixing bowl, cream room temperature butter and white sugar. Beat in eggs and vanilla. Stir in salt and baking powder. With your mixer on a low setting, mix in flour, about a ½ cup at a time, alternating with milk and ending with the flour.

Pour batter over mixture in skillet. Batter may be so thick that you’ll need to dollop it into the pan by the spoonful, instead, and then gently spread it to even it out.

Bake about 40 minutes or until a toothpick inserted into the center of cake and about halfway down (not so far that it encounters the rhubarb) comes out clean. (I always start checking after about 30 minutes. You don’t want it to get too dry.)

dscf8119.jpg

Fresh from the oven

I never have the courage to turn my cake out onto a plate so that it really is upside-down, though the Gnome has had success with that method. If you want to give it a shot, let the cake cool a few minutes (5-10 max), loosen the edges with a knife and invert onto a serving plate.

First slice–just add fork

Serve alone or with ice cream or whipped cream.

NOTE: If you don’t have a cast iron skillet, you can substitute a nine-inch square cake pan. Heat your butter-sugar mixture in a frying pan or saucepan and transfer it to your baking pan before adding the rhubarb pieces.

Abundant is too tame a word to describe well-established rhubarb. If you have some in your garden or a corner of your yard, you know what I mean. Tune in right here in the coming weeks for a few more ideas on cooking with rhubarb.

Becoming a Home–and a Construction Zone: Early Days on the Diagonal, Part 8

Becoming a Home–and a Construction Zone: Early Days on the Diagonal, Part 8

(If you’re just tuning in the Early Days on the Diagonal series, you may want to start here and work your way forward.)

Not surprisingly, December just keeps getting colder. As far as temperatures go, life in our shed isn’t much different from sleeping on the ground. Not much construction work gets done—we spend most of our time trying to keep warm. Finally, on December 20th, when at 1:00 pm the thermometer reads 5°, all our water and canned foods are frozen solid, and the temperature keeps dropping, we know we can’t keep this up.

pict00631.jpg

Within two hours we find a furnished one-bedroom apartment in town. Temporarily, we leave behind a lonely-looking but imposing 2 1/2 story structure—shingled and, for the most part, enclosed.

We also face the reality of a drastically low bank account. If we want to finish the house, we have to find paying work. Consequently, we have barely any time to work on the house. Vicious cycle.

Nonetheless, we continue our building efforts on weekends, and by mid-April, after nearly four months in town, we move back to our land, this time directly into the shell of our house. It, too, is only covered with blackboard—for the moment—but we do have doors. No glass in our twenty-three window openings, so we’re still very exposed to the elements.

Once again we turn to plastic, but this time with a protective layer of landscape shade cloth and rows of strapping to protect the plastic from the rain and whipping winds. This combo does nothing to abate either the cold or noise, though. We wince every time the fierce wind blows and beats noisily against the plastic.

Naturally, a cold front moves in the same time day we do and temperatures drop to the twenties. Our little space heater can’t compete. At least we’re warm when we snuggle under the electric blankets the Gnome’s parents have provided.

img003_edited

Looking into kitchen area. Horizontal girts make perfect narrow shelves.

In May our phone is installed. Now we have access to the outside world. With no stairs yet, our access to the second floor is a ladder. Neither do we yet have running water; we’re still pretty much camping.

By the end of June, all the studs for our few interior walls are in place. We’re also beginning to put up exterior siding. With the height of the house and no scaffolding, this means even more ladder-climbing. It’s a slow process.

img006_edited

Upstairs with loft above. Look carefully and you can see some of the horizontal plastic strapping protecting our plastic-covered window openings.

The glass for our windows arrives in August. After installing them, we finish most of the exterior siding. We wait for lumber prices to drop before buying the rest. We also install our tub, toilet, and bathroom and kitchen sinks, but it will be a full year after we’ve moved back up here before we complete all the plumbing work and get running water. Since we’re dependent on an electric pump, getting water is also dependent on having electricity. The Gnome’s electrician dad does a walkthrough to assure us we’re doing it right. April 24th, 1981, the day we’ve completed our wiring and water is finally running to all our indoor fixtures, is a red-letter day for sure!

Our home’s far from finished—for instance, we’ve only now finished nailing down the subflooring that’s been sitting on joists for a year—but we finally bring all our belongings home from the storage unit where they’ve been sitting for eighteen months. It gives the place a homey feel.

Punkin and Cuddlebug’s extracurricular activities keep us so busy that work on the house slows to barely a crawl. Living in an unfinished house means working around people, furniture, and stacks of unpacked boxes, slowing things down even more.

img005_edited

Lumber gets stored inside to protect it from the weather.

It will be another five years before we have a kitchen counter and cabinets, and still another before we get around to painting our interior walls, build a closet, and finish the exterior siding.

img002_edited

Before we had a closet

In truth, we will never get finished. When we once again have time—and money—to finish the job, the house will be begging for some serious rehab and remodeling. But that’s another story for another time. Meanwhile, stay tuned for a bonus segment of Early Days on the Diagonal.

finished-house

Except for painting the window trim (we’d started, upper right) and vent openings below windows, this is as finished as it gets until thirty years or so hence. But we did it all by ourselves, y’all!

California Dreamin’ – Continued

California Dreamin’ – Continued

Last Tuesday’s post tells a bit about our recent trip to California. I won’t repeat it here. Just wanted to share some more photos as promised. (Some pix by the Gnome; some by me–can’t remember whose is whose anymore.)

Leaving Pt. Reyes

Pride of Madeira


Windblown

Point Bonita, across the bay from San Francisco

Scene 1 from the Hearst Castle

Scene 2 from the Hearst Castle–the man knew how to find a heck of a view.

Surfin’

Oceanside Pier at twilight

Nearly full moon


So many orange, lemon, and quince trees. How I wanted to reach up and snatch a juicy one.

This guy was a real showoff.

Don’t let this soft-looking Teddy Bear cactus fool you . . .

their spikes can cause serious injury.

Western jay

See those big patches of yellow? California’s wildflowers were just beginning to put on their display while we were there, working their way up the mountainsides.


Lizard


San Simeon

Moving on Up: Early Days on the Diagonal, Part 7

Moving on Up: Early Days on the Diagonal, Part 7

(This is the seventh in an eight-part series about our early attempts at modern homesteading. If you’re just tuning in, you may want to start back at the first one and work your way forward.)

We’re using a post-and-beam construction technique. It’s the easy way to go for the open floor plan we’re set on. After putting in floor joists, we begin work on our posts. Lifting them into place is a struggle—each post is made up of three 2×6 boards that are ten feet long, weighing almost 150 pounds each. That’s a lot for the two of us to manage without proper equipment. As physical as the work is, it’s not enough to keep us warm on fall days.

img068

The first post has been successfully raised.

On October 5, as we begin the fourth month of our adventure, we raise the last of the twenty first-floor posts. The same day we’re surprised to look out over the field and spot our first snowfall of the season; leaves are just now beginning to change color.


Beam-lifting turns out to be another feat requiring engineering creativity. Eleven-foot lengths of built up 2×10’s are even heavier than the posts and have to be lifted eight feet up to attach to the posts. Relying on ladders makes us nervous as we fit and nail beams and posts together.


With the beams in place, we can install the tongue-and-groove upstairs floor, which will also serve as the downstairs ceiling. We don’t have a floor downstairs yet, but one upstairs is necessary to get on with the next steps. My parents lend helping hands again.


img009_edited_2

Our nearest neighbor and his dog come to watch when the septic tank and water reservoir are installed in late October.

Back in the shed, it’s gotten pretty chilly. We have a small electric space heater, but with an open doorway and our flimsy structure, it heats the rest of the county, too. Just for the sake of warmth, we usually dress for the next day before we hop into our sleeping bags each night.

The fall colors are enchanting. Clouds drift by, creating fascinating patterns of light and shadow on the mountains, Nature’s kaleidoscope. It’s so mesmerizing often we find it hard to focus on work.

Second floor posts and beams go up, followed by beams to support the ceiling and roof. To work on these, we lay a 2×10 board across the lower beams as a precarious scaffold of sorts.


After adding upstairs ceiling boards, we close in the structure with plywood and blackboard—hanging precariously around the sides, under the bottom, and over the top to do so—all because we lack scaffolds and sufficiently long ladders.

img014_edited-1

We rig up a pulley system to pull plywood and blackboard into position, then nail it in place from inside.

pict0053.jpg

We have to stay ahead of the weather, so my parents come for one last weekend of feverish work adding roof rafters, insulation, and plywood to support our shingles.

house-12_20_1979_edited

We add plywood to the front center for structural stability and begin framing for glass.

By golly, it’s actually beginning to look like a house.

(Stay tuned for the next episode of Early Days on the Diagonal.)

California Dreamin’

California Dreamin’

The Gnome and I recently returned from our very first trip to California, where we were guests of dear, decades-old friends. It was phenomenal, and the best part is that even after being in each other’s pockets for nearly every waking hour of our two-week visit, we’re still tight (I hope!).

We visited the south, the north, and in between; we saw the coast and the desert; we went to Indio, Oceanside, San Diego’s Balboa Park, San Simeon, Chico, San Francisco, and Berkeley. We saw three amazing plays, toured museums, rode the cable cars, and spent a few hours at Fisherman’s Wharf. We explored a national park, a national seashore, a national maritime historic park, and a national monument. We marveled at the cacti, animals, palm trees—lots and lots of palm trees, snow-capped mountains, and wildflowers.

We listened to the the sea lions and roamed around Hearst Castle. We drove past hundreds of wind turbines and miles and miles of almond trees; we hiked into a canyon and up a mountain, around a lake, and through the woods; we played Phase 10 and Pandemic (now, that’s a brain strainer). We traveled to Point Reyes (the only foggy day of our journey, so we could barely see its lighthouse), and we stood in hushed awe among the mighty redwoods in Muir Woods.

We had good times with our friends’ very grown up children and their fine partners. We bought groceries together, we cooked together, we ate great food and drank fine wine together, and we shared hours of light banter and deep conversation.

It was a busy couple of weeks. Words can’t do it justice. Neither can photos, but I can’t resist the urge to share. There are far too many to put up on one post, so I’m planning a follow-up in a week or two. (Except for sunsets, photos courtesy of the Gnome)

Juxtaposition

Looking up down in Palm Canyon

Joshua trees in Joshua Tree National Park

Joshua tree in bloom

I’ve seen sunrises over the Atlantic, but this was my first Pacific sunset. It did not disappoint!

Another Pacific sunset

Around San Simeon

Pt. Reyes National Seashore on a foggy day

Redwoods at Muir Woods National Monument

Redwoods at Muir Woods National Monument

Golden Gate Bridge

San Francisco from across the bay

Grabbing some rays

Moon jellies, Aquarium by the Bay

California poppies were popping up everywhere.

It was a kick watching the cable car turntables and the grip operator at work. We were lucky to snag outside seats. We held on tight!